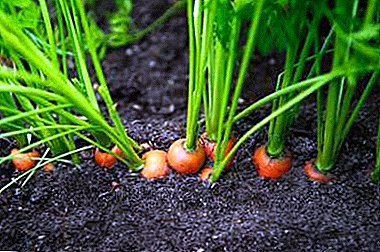
Each case can be approached wisely - this even applies to planting carrots, because every gardener knows - this is a very capricious plant. It has small seeds, it springs for a long time.
There is an easy way to plant carrots - in starch! This method will save time and facilitate the landing process.
The article describes in detail the essence of the method with pros and cons, step-by-step instructions, as well as alternative methods of planting carrot seeds in the ground.
The essence of the method
The essence of sowing in starch lies in the wet method of planting. Even if you stick each seed on toilet paper or tape - it does not guarantee uniform gluing, unlike our way. If you plant dry seeds, you will have to wait a long time until they get drunk and swell. Seed preparation begins 2-4 days before sowing with their lock and paste preparation.
Advantages and disadvantages
The advantages include:

- Convenient to plant. Seeds do not fall apart, but remain exactly where you put them.
- Saving. Due to the strict proportion it is possible to save seed.
- Moisturizing. Kleister helps to retain moisture around the seed, which improves its germination.
The disadvantages of the method are as follows:
- Time consuming The sowing process is preceded by a long preparation: moistening, cooking paste, aging, etc.
- Plant very quicklysince the life of the finished solution is less than 6 hours.
- Require good soil moisture to dissolve the paste.
Step-by-step instruction
To implement the plan, we have prepared detailed instructions, following which you can easily get a good harvest.
Necessary inventory
As an inventory, prepare:
- 1 pan;
- 1 deep plate;
- 1 tablespoon;
- 1 piece of gauze;
- 1 piece of non-woven fabric;
- polyethylene film;
- 1.5 l plastic bottle;
- awl;
- watering can.
Cooking jelly from starch
It's time to cook a paste based on starch jelly. For this we need 400 ml of water and 2 tbsp. l dry starch.
- We put water on a strong fire and bring to a boil, extinguish the fire.
- In a separate plate, well stir the starch and begin to pour into the hot water in a thin stream.
- Stir well.
Make sure that the paste is not very thick.
Seed preparation
 Seed preparation begins with a germination test. To obtain a high-quality crop, the largest and healthiest seeds must fall into the ground.
The easiest way to sort - 5% solution of salt. Pour the seeds into it and wait 10 minutes.
The most “vigorous” seeds will settle on the bottom, and the lungs and the sick will come up. We leave only the first, the second can be poured.
Now perform the following activities:
- The prepared seeds are soaked in clean water until visual swelling.
- Water is changed at least 2-3 times every 12 hours, and pop-up seeds are removed.
- After soaking, the water is drained, the seeds are spread in a thin layer on gauze to remove excess water and cover with a damp cloth on top.
Temperature 20-25 degrees - ideal for germination. On average, the procedure takes from 2 to 4 days. Germinated seeds should be planted immediately, but if, for any reason, this is not possible, then they should be stored in the refrigerator for no more than 2 days, preventing them from freezing.
Getting a mixture
It is very simple to calculate the number of seeds needed to mix with the resulting paste. For each 250 ml of paste, add 10 g of germinated seeds. In this case, they are well distributed in the mixture with equal intervals between each other. Stir the mixture gently, breaking up any lumps that occur. Pour the mixture into a plastic bottle, in the lid of which we make a hole with a diameter of 2-3 mm.
How to plant in open ground?
 The direct sowing process is simple:
- We create in the soil smooth grooves with a depth of 2-5 cm, with a palm width. Moisturize the soil with a watering can or a hose.
The bottom of the grooves should be slightly tamped with a plank or foot.
- Pour the starch mixture into the grooves through the hole in the cork of the bottle. The mixture consumption should be 200-250 ml per 1 meter of bed.
- We fill crops with loose soil with a small slide, and then re-pour water from the watering can.
Care for the first time after sowing
- At first it is necessary to maintain the moisture of the soil and seeds. To do this, fresh beds covered with plastic film.
- Water the garden copiously and actively. As soon as the first green shoots appear - water 2 times a week. At the same time, replace the covering material from the film with a non-woven fabric and let the carrots grow under it for another couple of weeks.
- The first and subsequent feeding make an interval of 20 days. The recipe is this: for 10 liters of water 35 grams of ammonium nitrate and 30 grams of superphosphate, and potassium salt. Feed immediately after the main irrigation.
At the edges of the carrot beds, plant a radish, it will mark the rows and allow to begin to loosen between the rows a little earlier.
Alternative methods
Plant carrots can be different. In addition to planting with starch, 7 more alternative methods are distinguished:
- Planting dry seeds. The fastest, but not the most effective way. Far from everything that is not in our hands.
- Planting germinated seeds. We used this method, for the difference that without kissel the seeds fall unevenly, which makes them grow worse and the fruits become uneven.
- "In the bag." A handful of seeds are placed in a moistened bag. Shoots spit in 10-12 days.
- "With sand." The material is mixed with sand, so that the fruits grow especially smooth.
- "Mouth". Seeds, together with water, are collected in the mouth and sprayed as if from a spray bottle. Allows you to achieve a good uniformity.
- "On the tape." Each seed is glued to a paper tape, stretched on a bed and sprinkled with earth. The store sells a limited number of varieties.
- "Dramatized". It lies in the fact that each seed in industrial conditions encloses in a solid shell-dragee, saturated with moisture and fertilizers. When planting gives an "explosive" start of growth, germination is higher than other methods.
Planting carrots with starch allows you to achieve a good harvest, because it requires detailed preparation of seed, which contributes to success. The advantages of the method are more than worth the time required for its implementation.


