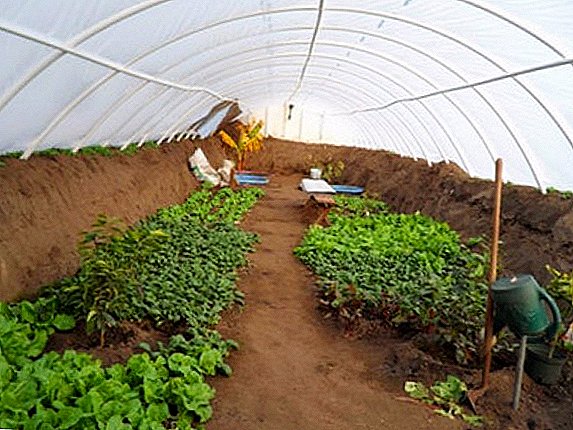
 You can provide your family with fresh vegetables and greens from early spring to late autumn thanks to the excellent helper in the form of a greenhouse. Among summer residents, the construction of polypropylene pipes is very popular, and you can quickly arrange it yourself. Such a structure will be strong, durable and at the same time not very costly.
In this article we will provide step-by-step instructions on how to build a greenhouse from polypropylene pipes with your own hands, with additional diagrams and descriptions.
Drawings and sizes
Many gardeners prefer to equip the greenhouse of a fairly large size, which will allow you to go inside and grow there several types of crops. It is important to think in advance about the construction of the roof, where the windows and doors will be located.
When developing the project of a future greenhouse, it is necessary to take into account the fact that the supporting elements and nodes-connectors should be evenly spaced. Only in this case will it be possible to achieve the stability of the integral structure. It is especially important to consider the outer coating, namely its weight. After all, if the agro-canvas and the film are quite light, then, for example, polycarbonate sheets are very heavy, which means they can damage the structure.  Therefore, choosing a material with a large weight, you need to consider additional supports and place them in the middle of the roof of the greenhouse.
Before building a greenhouse or greenhouse made of polypropylene pipes, it will be useful to own a clear drawing where various details and all sizes, as well as types of fasteners, etc. will be painted. Polypropylene pipes are perfect for building small greenhouses and for building large greenhouses. But if you plan to build a greenhouse longer than 4 m, you will need to take into account the strength and load of the roof. Experienced gardeners advise to design a greenhouse with a height of about 2 m, a width of 2.5 m and a length of no more than 4 m.  Such parameters will be comfortable both for the gardener, who will take care of vegetable crops, and for plants that will grow in the greenhouse.
Did you know? According to studies, the first greenhouses were built in ancient Rome. In appearance, they almost did not resemble modern designs. In the middle of the XIII century, such buildings appeared in Germany. There was a winter garden. It was in this garden that King William of Holland was received.
Characteristics and quality indicators of polypropylene pipes for greenhouses
The classic materials used to construct greenhouses are wooden bars and metal. But such materials have a number of significant drawbacks. Wooden bars do not differ in durability, as they are damaged and rotted under the influence of natural conditions.
As for the metal, it is, being durable, characterized by difficulties in processing. In addition, a metal greenhouse is much more difficult to dismantle if necessary. That is why ordinary plumbing is becoming increasingly popular. polypropylene pipes. They can last much longer than parallel bars made of wood, and their cost is much cheaper than metal. Practically any summer resident can cope with such material, but it will be easier to master the design, of course, for those who have dealt with the installation of water supply systems at least once in their life.  It should be noted that the greenhouse of polypropylene pipes, step-by-step instructions for making with our own hands, which we will provide below, is amenable to reusable assembly. Such structures usually cannot withstand the snow load, so at the end of the warm season they are recommended to be dismantled. But if the coating was made not by film, but by polycarbonate sheets, then such a greenhouse design can easily bear both wind and snow loads. But without any problems, polypropylene is opposed to both winter frosts and ultraviolet, which allows the frame not to collapse during the whole year.
Perhaps the main of many advantages polypropylene frames is their low cost. Also, a nice bonus is the fact that you can place a greenhouse in any corner of the suburban area, having thought through the necessary construction in advance. And if necessary, in the next season, the greenhouse can be moved to another place without problems due to simple dismantling. 
Did you know? Currently, the largest greenhouse is in the UK. The complex consists of 2 large rooms. Here you can watch a huge number of tropical and Mediterranean plants: banana palm trees, bamboo, coffee, olives, etc. The project was opened on March 17, 2001.
Using polypropylene pipes for the greenhouse frame, at the exit the summer resident will receive a heat-resistant, durable, and, importantly, environmentally friendly structure. In general, a number of main features of such a framework for a greenhouse can be distinguished:
- resistance of PVC pipes to temperature conditions (up to 85 ° С) and pressure (up to 25 atmospheres);
- the frame of polypropylene is subjected to rotting, corrosion, rust, limestone deposits, the influence of bacteria;
- pipes are well cleaned and washed;
- This kind of material is used as a transportation of drinking water, which confirms its compliance with physical and chemical standards.
Learn more about all the intricacies of growing in a greenhouse: tomato, cucumber, eggplant, sweet pepper and strawberry.
Required materials and tools
In order to build a greenhouse from PVC pipes with your own hands, you will need:
- Boards that will be used for arranging the base of the greenhouse, as well as for the construction of doors and windows.
- Polypropylene pipes. You can use pipes with a diameter of 25 cm or 32 cm.
- Wooden rods about 60-70 cm long. The diameter of the rods should be less than the diameter of the pipes.
You also need to prepare material to cover the greenhouse (for example, film), brackets for attaching pipes to the base of the greenhouse, small wooden blocks, nails and a hammer.
The construction of the greenhouse. Step-by-step instruction
For the construction of greenhouses made of PVC pipes with your own hands, you can use the drawings that are presented in this article, and you can design your own structure scheme. We offer detailed instructions for the construction of the greenhouse, making adjustments to which you can make any greenhouse to your taste.
1. First you need to select and prepare the area where the greenhouse will be located. The place should be flat and open to the sun. It is recommended to pour under the greenhouse strip foundation, but you can also just lay out the perimeter in blocks or brick. In our case, ordinary boards will be used, which are laid out on a plot with a rectangle and are interconnected. This method will be the fastest and easiest. 
Important! In order to make the base more durable, you can also use wooden bars. They need to gash and nest one another, then drill through and tighten bolts.
2. Then follow the longer side of the wooden frame to install the rods. To drive rods into the ground should be at a depth of about 30-70 cm, it is recommended to focus on the softness of the soil. At the same time above the ground level should be approximately 50-80 cm length of the rod. The distance between the rods should be no more than 50-60 cm. It is recommended to make several light cuts on the rods in advance so that it is easier to fix polypropylene pipes on them.
3. Now you can proceed directly to the collection frame. You should put one end of the PVC pipe on the rod, bend it, and fix the other end on the opposite side of the wooden base frame. It is very important to measure the length of the tubes correctly so that the summer resident would be comfortable in the future to enter and work in the greenhouse. Following this algorithm, it is necessary to install all subsequent arches. 
4. Then you need to fix the polypropylene pipes at both ends with special galvanized brackets. You can buy them in the same store where you bought pipes.
5. Next, you will need to install the gables of the greenhouse. They can be made from the same PVC pipes, or from wood. Then the frame must be fastened with transverse elements so that the overall structure is more stable. Use for this preferably the same plastic pipes. One of them is placed in the center of the greenhouse and secured with screeds. If the room is large, you can additionally place two more transverse elements on both sides. 
6. Now it's time to cover the structure with a film. It can be fixed with the help of small wooden sticks to the bottom boards, using nails and a hammer.
Important! To avoid ruptures and damage to the film, it is recommended to make allowances during the fastening process, avoiding excessive stretching of the material.
7. At the end should take the door and windows. The film should be wrapped with each construction, after which it should be fixed on the main frame.
As you can see, constructing a greenhouse out of PVC pipes with your own hands is not at all difficult. The main thing is to choose the right materials and comply with the calculations carried out in advance. If you follow all the recommendations, then this greenhouse will serve the summer resident for many years.


