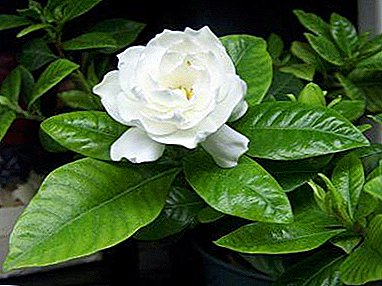
Obtaining new copies of the exotic beauty of gardenia with the help of breeding at home is not at all difficult.
It is enough to choose the appropriate method and follow the recommendations from our article on the procedure.
If you properly prepare planting material, soil and tools, to cope with the task of reproduction will be under the force of even a beginner florist. Below we will talk in more detail about how to propagate a plant with the help of seeds and cuttings of shoots.
Main ways
For those who have never encountered the reproduction of gardenia, you need to know that there are two ways to increase the number of plants for home or sale:
- seeds;
- cuttings.
The material for propagation by cuttings can be collected not only from the actively developing plant, but also from the deceased, if he still has at least small areas of healthy lignified shoots. You can collect cuttings after carrying out the forming pruning.
You can get seed in two ways:
- buy in a specialty store;
- assemble yourself.
The second method is preferable, since in this case one can vouch for the quality of the seeds. It is not difficult to collect the seeds, you just need to leave a few buds after flowering, so that they ripen.
Copies obtained from cuttings will bloom in a year, those that grew from seeds no earlier than two years.
How to root the cuttings?
The easiest way to use the apical parts that can be assembled after trimming. The disadvantages of the method include quite a long rooting in greenhouse conditions, using growth stimulants.
The time of the procedure
The most optimal period for the procedure of rooting cuttings - the end of winter - the beginning of spring. If nothing happened at that time, you can try again until the end of July, that is, before the flowering begins.
Step-by-step instruction
Preparatory stage
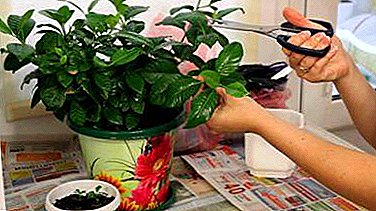 It is necessary to prepare a sharp disinfected blade, a solution of potassium permanganate or growth stimulants.
- Also need a primer. You can buy ready for gardenia or azaleas, also suitable universal soil for flowering plants or make a mixture of their own. This will require equal proportions of peat, coniferous soil and sand.
- The pot should be wide and shallow. At the bottom, a layer of drainage is necessarily laid, the role of which can be performed by small pebbles, broken bricks or expanded clay.
In water
- Before rooting, the cuttings should be soaked in a solution of stimulants for the night. You can use Epin, Zircon vitamins.
- After that, move into the water with the addition of activated carbon a couple of centimeters from the bottom cut.
- A couple of weeks will begin to appear the first roots and buds on the stem.
- After that, the cutting can be planted in the ground.
In the ground
- The semi-timber top of the shoot must be cut at about ten centimeters.
- All leaves with the resulting cutting should be removed, leaving only a couple of pieces at the top.
- It is important to ensure that these leaves are not damaged, since in the future they will serve as a growth point for new buds.
- The resulting planting material for a couple of minutes is lowered into the solution of potassium permanganate or immersed for 4-5 hours in a solution of growth stimulant.
- Cuttings are planted in the ground.
- Then they are covered with banks or film, taking into account that the resulting greenhouse will need to be periodically opened for irrigation and oxygen access.
- Pots put in the heat and maintain a temperature of +25 degrees.
- It will take a month for the first shoots to appear on the cuttings.
- When it becomes clear that the cuttings have taken root and are actively growing, they are transplanted into pots for permanent cultivation.
Departure after landing
 When cuttings will surely grow, you need to evaluate their health. If black spots appear near the kidneys, it means that the plant is not comfortable, it shows symptoms of the onset of rotting. In this case, it is necessary to resort to the help of fungicidal solutions. When the cuttings are reached in height of fifteen centimeters, it will be possible to hold the first pinching. This procedure is the best stimulation for the emergence of new shoots.
You can also pinch the side shoots that have reached 10-12 centimeters. Through this manipulation, you can give the plant the shape of a small bush.
A young plant is very susceptible to water quality, therefore, irrigation should be carried out only boiled distilled water. Gardenia is a light and heat-loving flower, but in no case should a pot with tender shoots be placed in a place that is intensely illuminated by the sun, the plant will get burned and die. It is also important for the first time after transplantation to prevent exposure to the shoots of drafts, cold and sudden changes in temperature.
The air around the tank with young shoots should be regularly humidified to eliminate the risk of their death from pest infestation.
How to propagate seeds at home?
Sowing occurs as follows:
- Seeds are evenly spread over the soil surface and sprinkled with a thin layer on top of it.
- Using a sprayer, the soil is slightly moistened.
- Capacity with seeds should be covered with a film and put in a warm place, where it is possible to maintain a temperature of +25 degrees.
- From time to time, the film needs to be removed, aerated and moistened seedlings.
- The first shoots will appear a month after sowing.
- After this, sprouts need to be planted in separate pots and covered with a jar.
- When young plants begin to resemble a bush, they should be transplanted into a larger container again.
- At this time, it is desirable to make the first feeding.
In spite of the fact that gardenia is referred to as difficult-to-root plants, gardenia can be propagated independently under the power of any gardener. If you have never had a chance to carry out the procedure, then it is better to choose your method of cutting. Everything will turn out, it is only necessary to follow simple rules and be patient.


 It is necessary to prepare a sharp disinfected blade, a solution of potassium permanganate or growth stimulants.