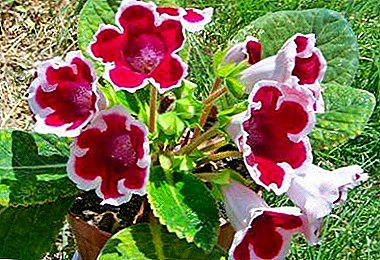
Plastic and clay pots are great for growing. Each of them has its pros and cons, it all depends on the choice of a person.
This amazingly beautiful flower requires increased attention to itself, so it is important to know the rules of care for gloxinia. At the same time, the capacity in which the plant is planted is of great importance.
How to choose a pot for gloxinia and what to pay special attention to, we will tell later in the article, we will also give step-by-step instructions for preparing a flower for planting.
Root system features
Gloxinia is a plant whose root system is represented as tubers. This tuber consists of two parts: the lower and upper. The lower part, on the contrary, is not particularly convex, more smooth. From above it has a curved shape and is covered with buds in the form of small tubercles. Small roots grow along the entire surface of the gloxinia tuber, including near the buds.
What soil is required?
Gloxinia - very fastidious plant. In order to grow quickly and correctly in the future, you need to choose a suitable soil for it. It should be soft, nutritious, fluffy and breathable.
It is important to stop the choice on the most suitable composition of the soil for the plant., after all its further growth and health depends on it. Sinningia prefers enough nutritious land for planting, which can provide a large amount of nutrients during the flowering period.
 Gloxinia is quite suitable for a similar soil composition, which is used for planting conventional violets. But the difference is that you need to add baking powder, for example, vermiculite, perlite or sphagnum moss.
You can do it another way: prepare the soil yourself at homeWithout buying ready mix in specialized flower shops.
To do this, you must mix together two parts of sand, three parts of peat and three parts of the ground from under any deciduous tree, except for oak.
Ordinary manure or humus can be added to increase the chances of rooting a plant. (proportion: 200 grams for every 5 liters of the mixture). Such a preventive measure will help Gloxinia grow better and do without additional feeding in the future. In case of unwillingness to prepare such fertilizers with your own hands, you can take any fertilizer for flowering plants.
In order to make the soil more looser, you can pick up and add rotten sawdust. They serve as a wonderful breaker and soil nutrient.
Watering
Do not water the plant with too cold water. (about how to properly water and feed the plant, read here). Irrigation water should best be soft (slightly boiled, filtered, thawed). The temperature for the water should be best at room, cushy. But it is important that if gloxinia is at a temperature of +18 degrees, this does not mean that it should be filled with water of a temperature of +25 degrees. Water should be 2-3 degrees above ambient air temperature. After 20-30 minutes after pouring, the remaining water should be drained from the pallet.
To prevent the tubers from rotting at the flower, it should be watered gently around the edge of the pot or from the pan in order to prevent water from entering the center of the tuber and the leaves, because often the decay of the tubers occurs from above, from the growing point, and not from the roots.
An important point in the irrigation of gloxinia is its uniformity. With irrigation, the whole earthen room should be completely wet from above and to the base of the plant, and the pot itself should become much heavier. They can not be watered on a schedule, but only when the plant really needs it. After a slight drying of the top layer of soil, Gloxinia can be watered. It is imperative to follow, in order not to overdry and not to overfill them.
Next, a visual video about watering Gloxinia:
What capacity do you need?
 In what capacity to plant a flower? Sinningi can be remarkably grown in a pot of absolutely any shape. To ensure that the lower leaves do not touch the surface on which the pot is located, it is better to grow gloxinia in sufficiently high pots. Color pots does not matter. There is one recommendation: if the pot with gloxinia stands on a sun-drenched window-sill, then it is better to plant a flower in a pot of lighter shades to avoid overheating of the earth and burns on the leaves.
A gloxinia tuber should be 4 to 6 centimeters in diameter more than the tuber itself.. Grow plants preferably in wide shallow pots. The height of the pot should be such that at the bottom there is a drainage layer of about 2-3 centimeters, and on top of the drainage there is a layer of soil of such height that gloxinia tuber is completely covered with this soil and there will be a place for root growth. Plastic and clay pots are great for growing gloxinium.
Next, a visual video about the correct choice of capacity for gloxinia:
Preparing for planting at home
Step-by-step instruction
After careful preparation of the soil, should begin preparing the tubers for planting. If, during the rest period, they were located in an old pot, they should be removed from there, cut off the old roots and rinsed with water (we told about the peculiarities of gloxinia overwintering here). If there is any damage on the surface of the tuber, they should be immediately cut with a knife.
For the prevention of further decay, you can immerse the tubers in a solution of a fungicidal agent for half an hour, for example, phytosporin. It is impossible to plant them immediately after such an operation - it is necessary to dry for about a day. Ready to transplant the tuber should be smooth and firm (you can find out how to transplant and grow gloxinia here).
Drainage layer with a height of no more than three centimeters (foam, expanded clay), you must first put on the bottom of the pot. From above to fill in in advance prepared soil which should be tried not to be condensed, leaving it rather friable. In the center it is necessary to make a slight depression where the tuber itself needs to be placed. Then, sprinkle it on all sides with soil in such a way that it would be 2/3 immersed in the soil.
To prevent rotting of the tuber in the plant, you need to moisten the ground so that the water does not hit the center and on the shoots. In order to create the most favorable microclimate for germination, it is necessary to put a transparent plastic bag on the pot and put it in a lighter place. For airing once a day from the pot it is necessary to remove the package for 15-20 minutes. As soon as the first pair of leaves appears, the bag can be closed only for the night.and a few days later remove it completely.
Next, a visual video about planting gloxinia tubers:
The importance of choosing the right packaging
Attention! It is not necessary to plant small tubers in too wide and large pots, because then gloxinia grows roots, leaves and blooms longer.
- In too large a pot increases the likelihood to fill the plant during watering.
- Plants in large pots grow large and take up a lot of space.
- Too small a pot (less than 9 centimeters) will have to water gloxinia much more often.
- If the suns come to the pots, they should be bright colors.
- What are gloxinia leaf diseases and how are they treated?
- How not to destroy a flower: growing gloxinia and caring for it.
- Why does gloxinia not bloom and how to make it release buds?
- Why blacken, dry up, rot and gloxinia buds do not open?
- What to do if gloxinia is sick? Diseases with photos and methods of their treatment.
Conclusion
The main characteristic is the diameter of the pot when planting gloxinia. It is necessary to choose a pot at least 9 centimeters in diameter, even for the smallest tuber and a capacity of 4-5 centimeters wider than the diameter of the tuber. Then gloxinia will feel comfortable, and otherwise it will often dry and shed leaves.


